| |||||
-----Autodesk--------Revit----Architeture----Tutorials----------
For more Autodesk Revit Tutorials
Go to http://www.revittut.blogspot.com to learn more
revit 8.1 tutorials revit architecture revit arrowheads revit bim revit change camera position revit content revit countertop revit create grip family revit view title revit cross section views revit custom arrows revit custom view tag revit dimension at an angle revit door renumber revit dormer cut roof revit drafting view referencing revit walkthroughs revit family revit libraries revit library revit rendering revit site link
|
|
 |
| |||||
-----Autodesk--------Revit----Architeture----Tutorials----------
For more Autodesk Revit Tutorials
Go to http://www.revittut.blogspot.com to learn more
| |||||
-----Autodesk--------Revit----Architeture----Tutorials----------
For more Autodesk Revit Tutorials
Go to http://www.revittut.blogspot.com to learn more
| |||||
-----Autodesk--------Revit----Architeture----Tutorials----------
For more Autodesk Revit Tutorials
Go to http://www.revittut.blogspot.com to learn more
| |||||
---------------------------------------------------------------------------
For more Autodesk Revit Tutorials
Go to http://www.revittut.blogspot.com to learn more
| |||||
---------------------------------------------------------------------------
For more Autodesk Revit Tutorials
Go to http://www.revittut.blogspot.com/ to learn more
This download is the most recent build for Revit® Architecture 2009 software as a standalone product and as part of AutoCAD® Revit® Architecture® Suite 2009.
It is available to users who have validly purchased a license to Revit Architecture 2009 or AutoCAD Revit Architecture Suite 2009, and is subject to the terms and conditions of the end-user license agreement that appears during installation.
For a list of improvements, please download the Revit Architecture 2009 Web Update Enhancement List:
![]() Web Update Enhancement List (pdf)
Web Update Enhancement List (pdf)
Note: Build Number can be found in the Web Update Enhancement List
Please read before downloading and installing:
Service Pack Readme (pdf).
Read all instructions above then click the appropriate link to download.
Revit Architecture 2009 Web Update #3 Service Pack (32-bit) (exe - 128 MB)
Revit Architecture 2009 Web Update #3 Service Pack (64-bit) (exe - 54 Mb)
Notes:
Before downloading and installing:
Read all instructions above then click one of the following links to download.
Revit Architecture 2009 (exe - 490 Mb)
Revit Architecture 2009 for AutoCAD Revit Architecture Suite 2009 (exe - 490 Mb)
Download or get more information about a previous release.
Top 10 Reasons to Choose Autodesk® Revit® Architecture 2010 software
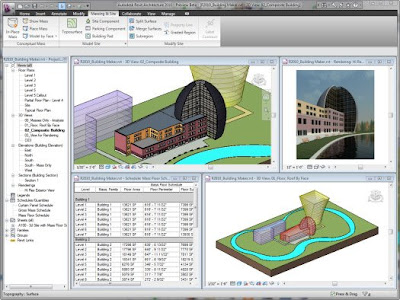
Conceptual Design Environment
New and innovative Autodesk Revit Architecture conceptual design features provide
easy-to-use tools for free-form modeling and parametric design, and the ability to
perform early design analyses. Sketch freely, create 3D forms quickly, and manipulate
forms interactively. Prepare your models for fabrication and construction with built-in
tools for conception and clarification of complex forms. Autodesk Revit Architecture
automatically builds a parametric framework around your most complex forms as you
continue to design, offering you greater levels of creative control, accuracy, and
flexibility. Take your design from concept model all the way through construction
documents, all within one intuitive environment.
Building Maker
The Building Maker feature in Autodesk Revit Architecture helps you transform your
conceptual forms into fully functional designs. Select and add faces to design walls,
roofs, floors, and curtain systems. Extract important building information, including
gross area per floor. Bring conceptual massing concepts from applications such as
AutoCAD® software and Autodesk® Maya® software, as well as AutoDesSys form•Z®,
McNeel Rhinoceros®, Google™ SketchUp®, or other ACIS®- or NURBS-based
applications into Autodesk Revit Architecture as mass objects and begin schematic
design.
Bidirectional Associativity
A change anywhere is a change everywhere. In Autodesk Revit Architecture, model
information is stored in a single, coordinated database. Revisions and alterations to
information are automatically updated throughout the model, minimizing conflicting
versions and significantly reducing unpleasant surprises.
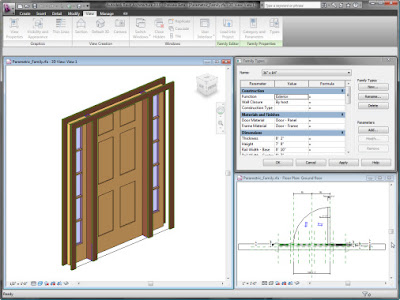
Parametric Components
Parametric components, also known as families, are the basis for all building
components designed in Autodesk Revit Architecture. These components offer an
open, graphical system for design thinking and form making, while providing the
opportunity to adjust and express design intent at detailed levels. Use parametric
components for the most elaborate assemblies, such as cabinetry and equipment, as
well as for the most elementary building parts, such as walls and columns. Best of all,
no programming language or coding is necessary or required.
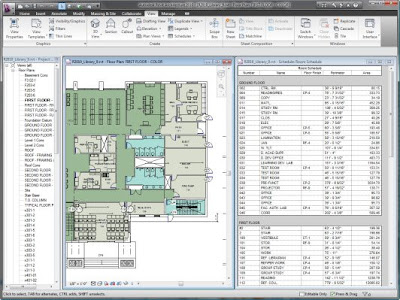
Schedules
Schedules provide another view of the comprehensive Autodesk Revit Architecture
model. Changes to a schedule view are automatically reflected in all other views.
Functionality includes associative split-schedule sections and selectable design
elements via schedule views, formulas, and filtering.
Detailing
The extensive detail library and detailing tools provided within Autodesk Revit
Architecture enable extensive presorting, easing alignment with the CSI format. Detail
libraries can be created, shared, and tailored to accommodate your office standards.
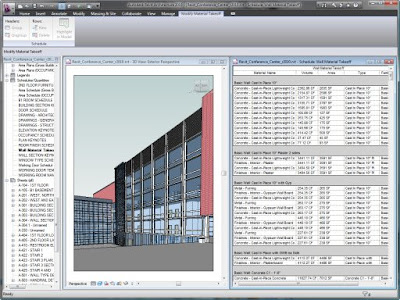
Material Takeoff
Calculate detailed material quantities with the Material Takeoff feature. Ideal for use on
sustainable design projects and for precise verification of material quantities in cost
estimates, this feature significantly smoothes the material quantity tracking process.
As projects evolve, the Autodesk Revit Architecture parametric change engine helps
ensure material takeoffs are always up to date.
Intuitive User Interface
The new release of Autodesk Revit Architecture features a streamlined user interface.
Find your favorite tools and commands faster, locate lesser-used tools more efficiently,
and discover relevant new features more easily. The result is less time searching
through menus and toolbars, and more time getting your work done.
Sustainable Design
Autodesk Revit Architecture supports sustainable design processes from the earliest
stages. Export building information to green building extensible markup language
(gbXML). Perform energy analysis using Autodesk® Green Building Studio® webbased
services, and study building performance employing Autodesk® Ecotect™
software. Use Autodesk® 3ds Max® Design software to accurately evaluate indoor
environmental quality in support of LEED® 8.1 certification.
Design Visualization
Create and capture fully photorealistic design ideas and contextual environments to
experience your project, even before it is built. Integrated mental ray® rendering helps
deliver high-quality output, faster render times, and a superior design presentation.